| Voir le sujet précédent :: Voir le sujet suivant |
| Auteur |
Message |
VincentB
Serial Posteur


Inscrit le: 23 Jan 2006

Localisation: A la playa, bajo el sol
Âge: 60

|
 Posté le: 23/10/2012 07:47 Sujet du message: Posté le: 23/10/2012 07:47 Sujet du message: |
  |
|
|
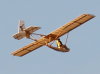
Thank's Tuomas for historic  for curiosity, can you post please a view of SK-24 for curiosity, can you post please a view of SK-24
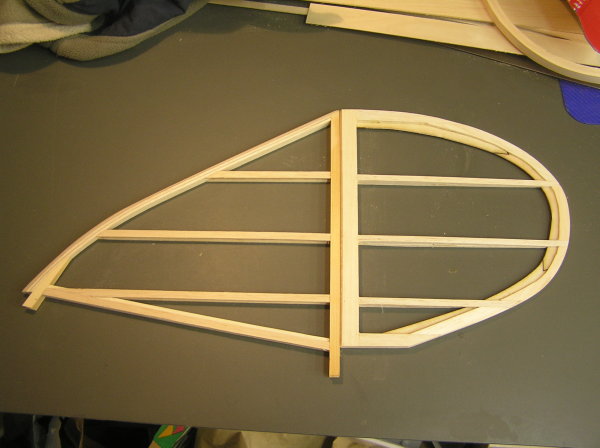
for curve trailing edge, it's very very easy to make with cable, I made that on my Mira and I find the result good and it's very strong

Retroplane et modélisme en pause, vanlife à haute dose. |
|
| Revenir en haut de page |
|
 |
tuootal
Apprenti Posteur

Inscrit le: 21 Mar 2010

Localisation: Espoo, Friisilä
|
| Posté le: 23/10/2012 21:16 Sujet du message: SK-24 |
|
|
|
Most certainly,
I was in progress of getting publication permission from Suomen Kuvalehti as that magazine still is running. It is quite successful and well known magazine here, you can visit their pages here : www.suomenkuvalehti.fi . Today they are totally different style magazine, no more airplane plans...., just weekly politics & business & activities & culture. Rather good, I have had subscription for long time.
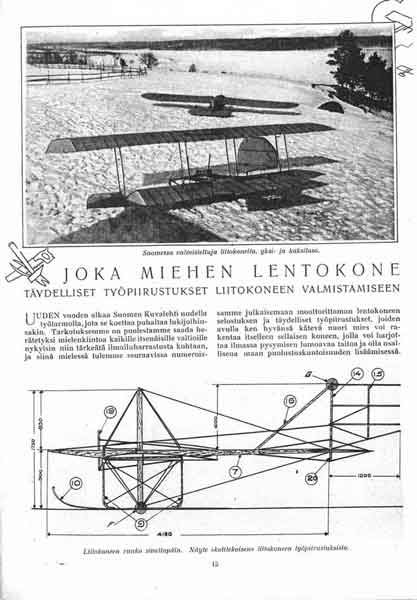
I have now obtained permission to post pages to my webpage. Due size constraints I will post here only lowres-version of one page. There is lowres version of whole package (6 pages) in my website http://www.iwaru.fi/gluhareff.html (0.5mb). I did publish also high resolution version at the same location, but... pls. note that it is 43mb... You can find both versions at the bottom of page. Use freely, but whenever referring them you must name source, ie. Suomen Kuvalehti 1924, 1-3.
Great many thanks to Suomen Kuvalehti for granting this possibility!
Couple things worth noting:
1. scans are poor quality. I visited Finnish National Archive to get copies of these pages and the originals were in rather bad shape. This quality also makes files quite large.
2. yes, obviously they are in Finnish :). No translation available.
3. the drawing technique is totally different than the way we do drawings today. They look quite strange, but you propably will understand key idea.
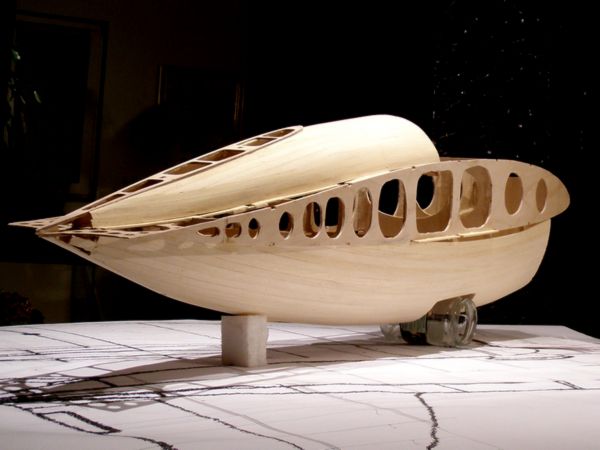
It might be extremely interesting to build actual scale glider based on these plans. It would be tremendous challenge. Where would you hide radio's etc?
Tuomas
|
|
| Revenir en haut de page |
|
|
tuootal
Apprenti Posteur
Inscrit le: 21 Mar 2010
Localisation: Espoo, Friisilä
|
| Posté le: 27/10/2012 19:11 Sujet du message: Continuing with fuz & wings |
|
|
|
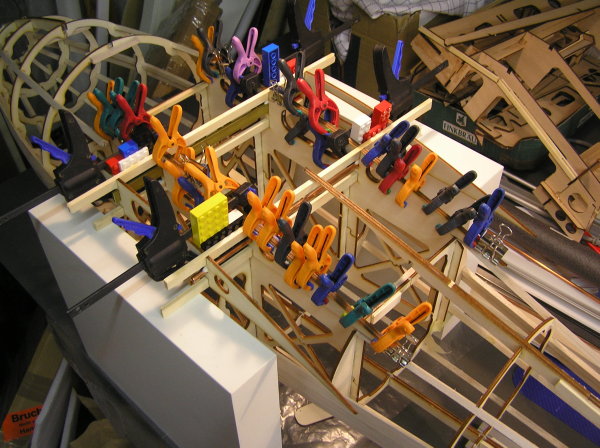
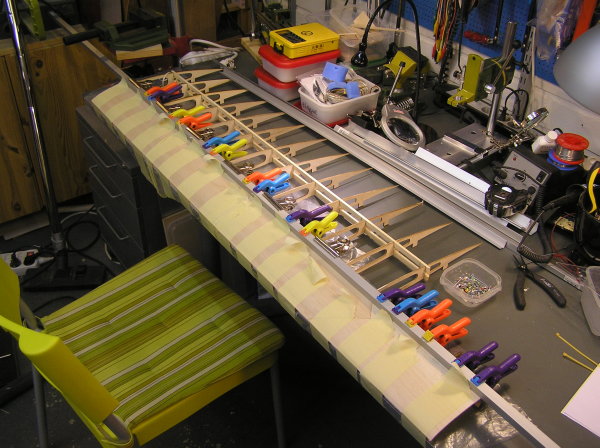
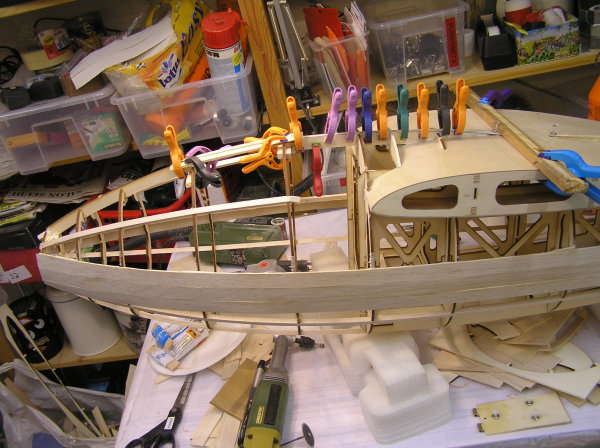
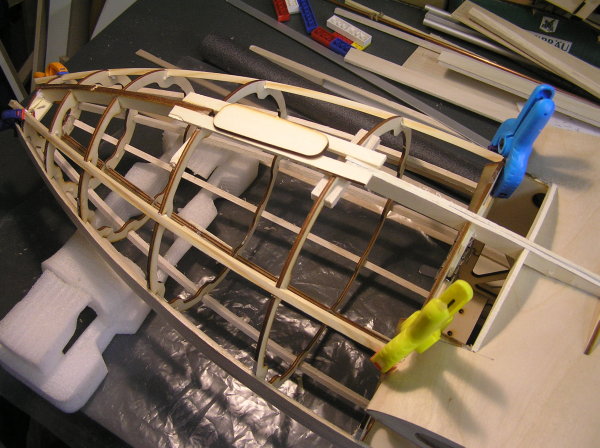
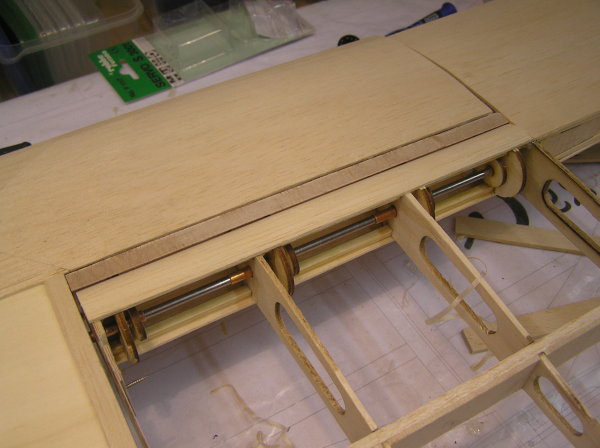
This looks a bit cluttered, but I am using cheap Ikea-shelves as supports to get wing supports aligned. There are quite a lot of gluing going on in this pic. First profile doublers, then lower internal spars, wing tubes, upper internal spars, outer profile-ends etc.
Last tail formers glued in place with elevator horn. I did not glue them in previous phase as now I can get them in level with wings. I had to use epoxy for this joint as the gf does not adhere using PVA-glue.
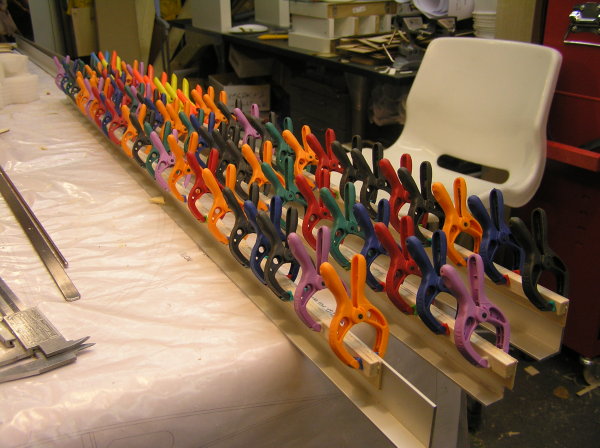
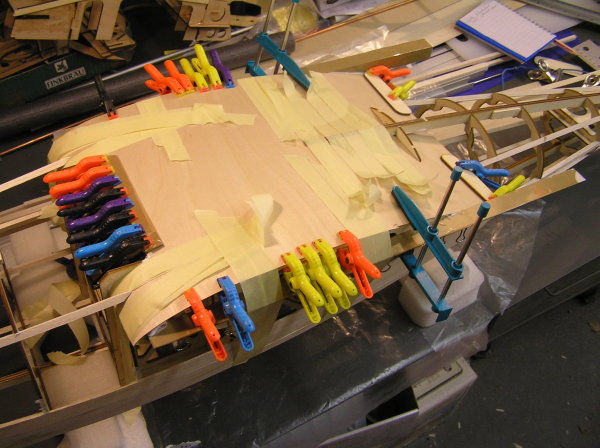
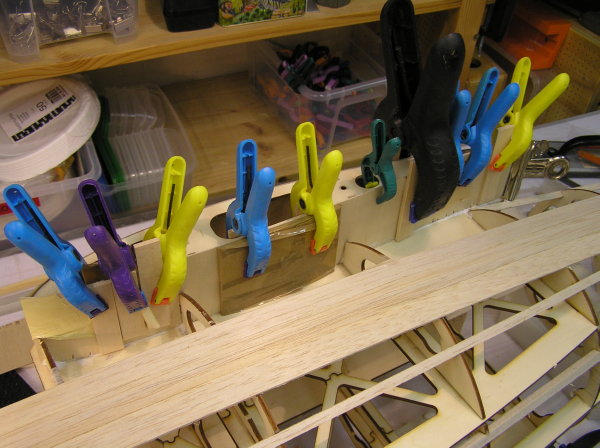
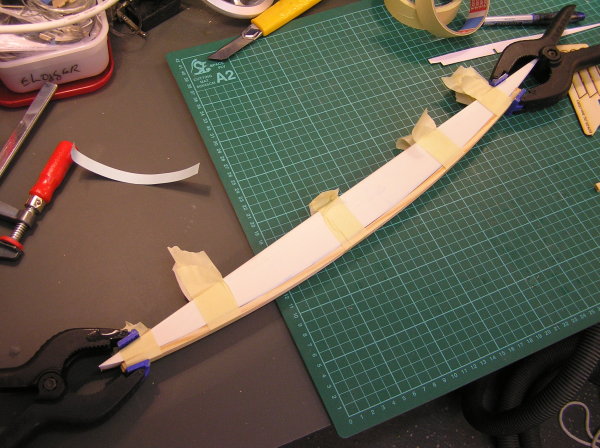
Torsion sheeting. I am using table & tape to compress torsion LE to place. TE of sheeting is compressed using alu profile. Note that I will glue shear webs in place in next phase as this way saves time on sanding top of shear webs.
Tuomas |
|
| Revenir en haut de page |
|
|
tuootal
Apprenti Posteur
Inscrit le: 21 Mar 2010
Localisation: Espoo, Friisilä
|
| Posté le: 03/11/2012 19:23 Sujet du message: forward |
|
|
|
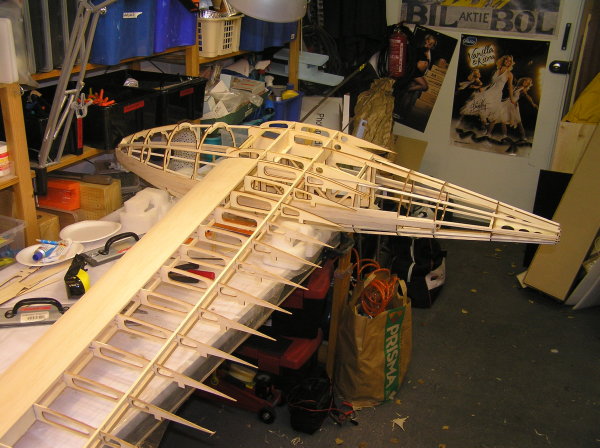
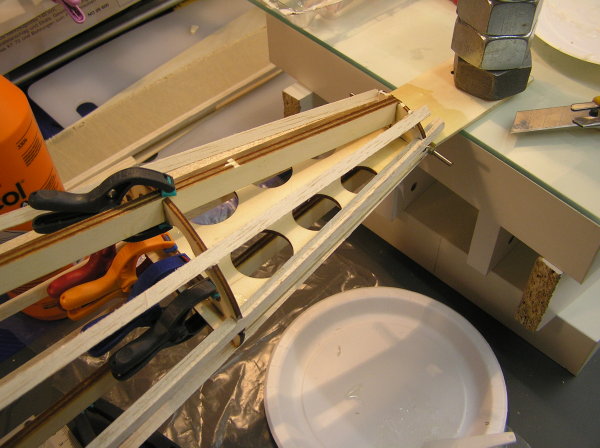
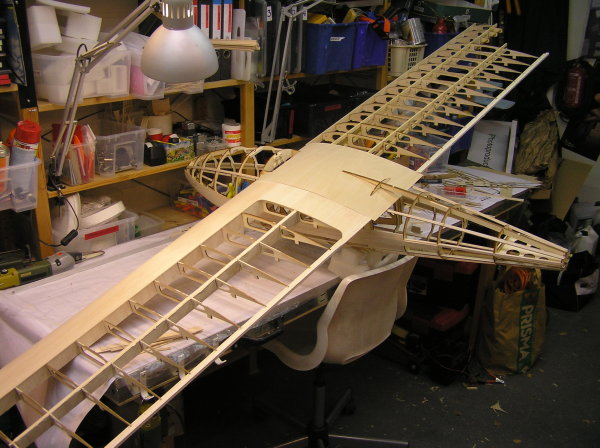
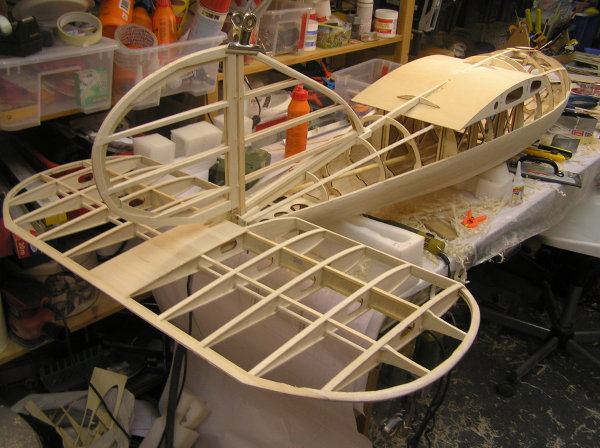
Just testing how the wings sit to fuselage. I really love CAD-designed planes with laser cut parts. Everything fits just perfectly.
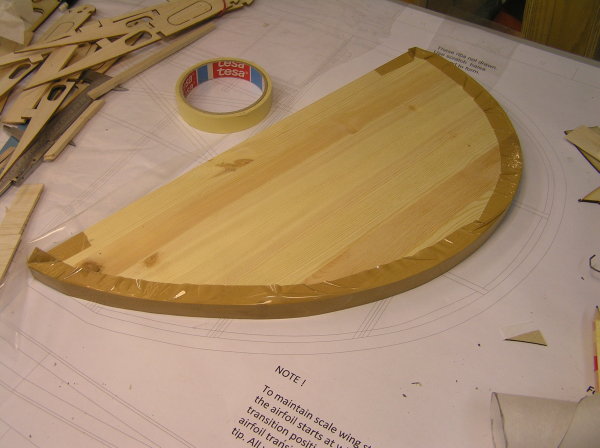
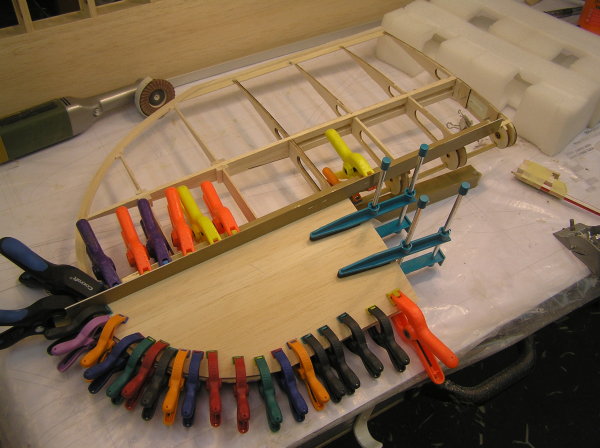
Some modelling art, trailing edges glued together
Second wing.

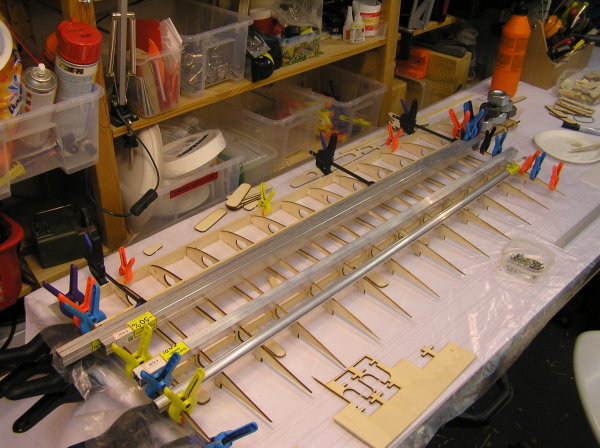
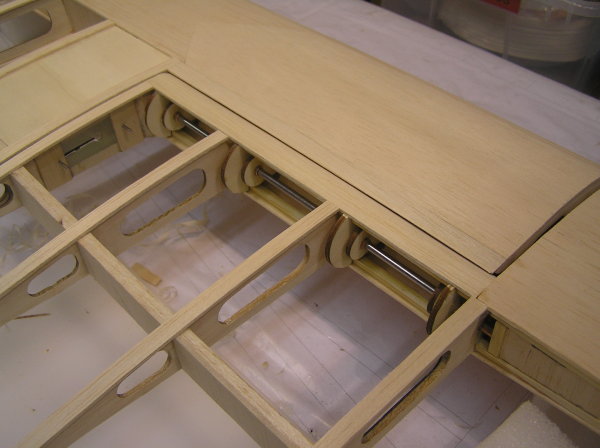
Shear webs to first wing. I am using 2mm shear webs all along. Plywood only at root, bays 1-2.
Then plywood sheeting to wing center part. Quite difficult to get aligned properly. Hopefully it will be good enough. |
|
| Revenir en haut de page |
|
|
tuootal
Apprenti Posteur
Inscrit le: 21 Mar 2010
Localisation: Espoo, Friisilä
|
| Posté le: 04/11/2012 21:42 Sujet du message: small steps |
|
|
|
Checking fit of wings. Looks good enough.
Tuomas |
|
| Revenir en haut de page |
|
|
tuootal
Apprenti Posteur
Inscrit le: 21 Mar 2010
Localisation: Espoo, Friisilä
|
| Posté le: 05/11/2012 21:36 Sujet du message: And wing shoulders |
|
|
|
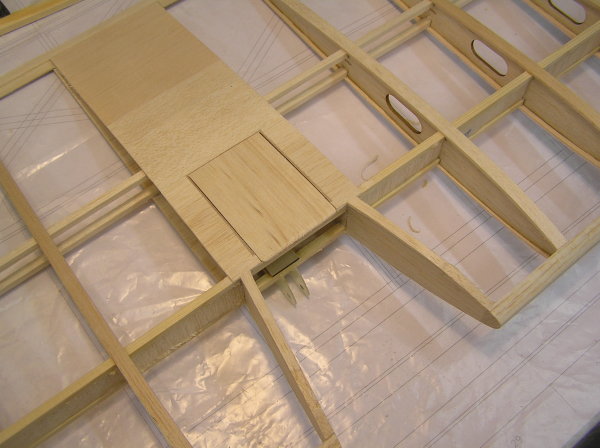
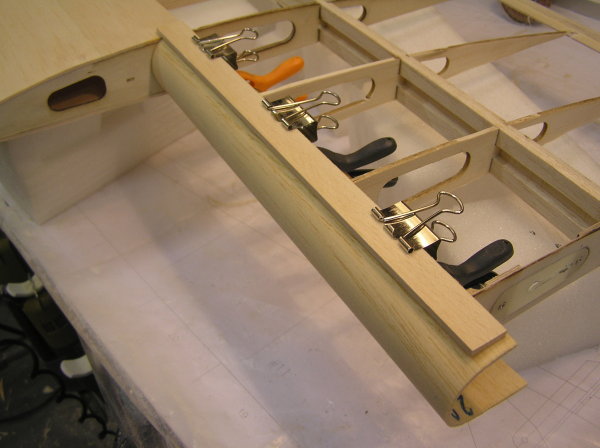
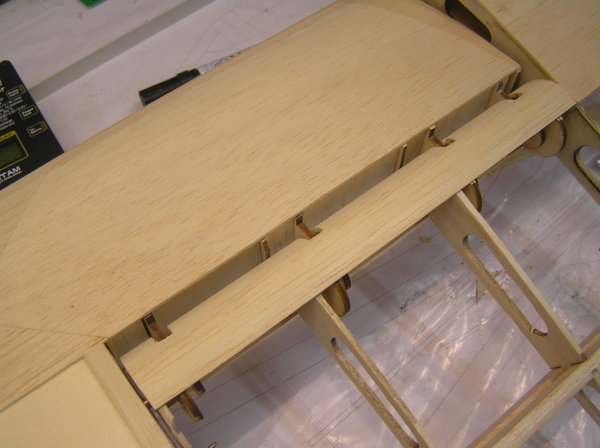
Next challenge is to sheet underside of wing shoulder (is it wing armpits? :)) using plywood. Quite easy task, but getting compression done properly required planning.
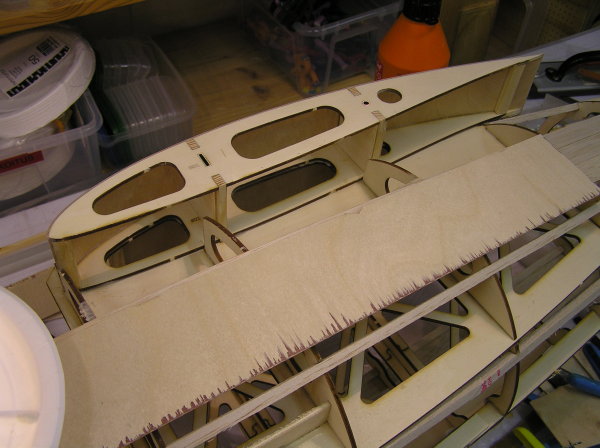
Before
After
Tuomas |
|
| Revenir en haut de page |
|
|
tuootal
Apprenti Posteur
Inscrit le: 21 Mar 2010
Localisation: Espoo, Friisilä
|
| Posté le: 06/11/2012 23:07 Sujet du message: Result |
|
|
|
And here is completed wing armpit. Good enough.

Tuomas |
|
| Revenir en haut de page |
|
|
tuootal
Apprenti Posteur
Inscrit le: 21 Mar 2010
Localisation: Espoo, Friisilä
|
| Posté le: 11/11/2012 21:23 Sujet du message: |
|
|
|
Bonjour!
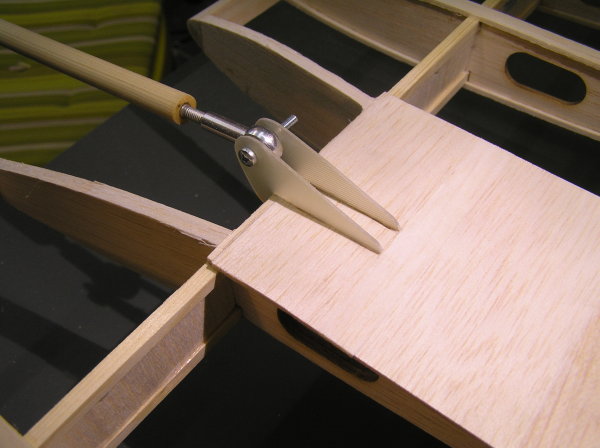
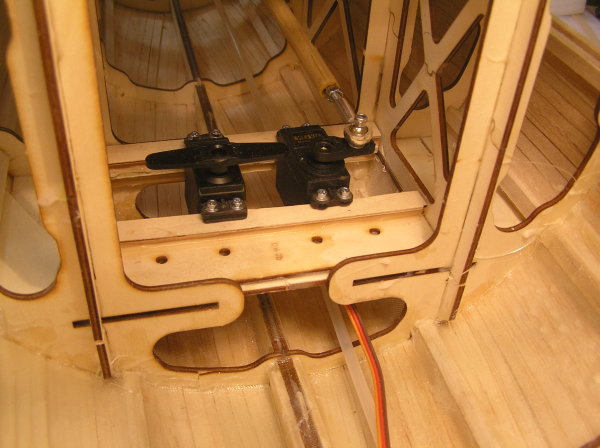
I have been doing all kinds of small (and boring) tasks like torsion sheeting, elevator & fuse sanding etc. etc. So nothing too interesting to show, but one thing which is slightly out of ordinary was completed. Elevator linkage. You have to remember that this is all moving elevator so putting linkage outside of elev looks kinda odd. But everything has it's purpose.
Tuomas |
|
| Revenir en haut de page |
|
|
tuootal
Apprenti Posteur
Inscrit le: 21 Mar 2010
Localisation: Espoo, Friisilä
|
| Posté le: 03/12/2012 00:09 Sujet du message: Minor glitch.. and hopefully correction. |
|
|
|
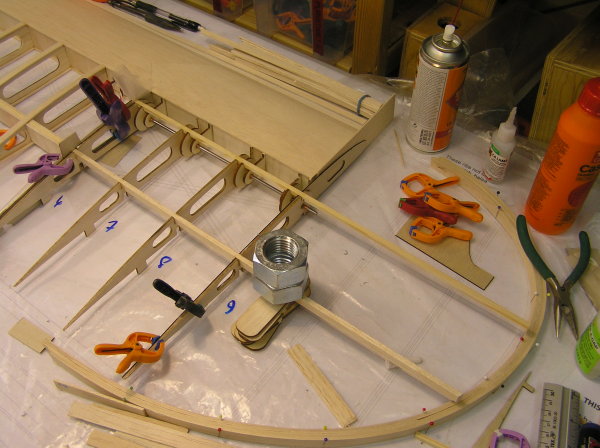
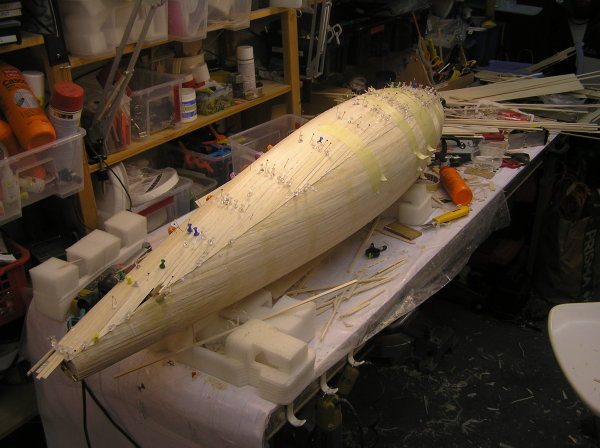
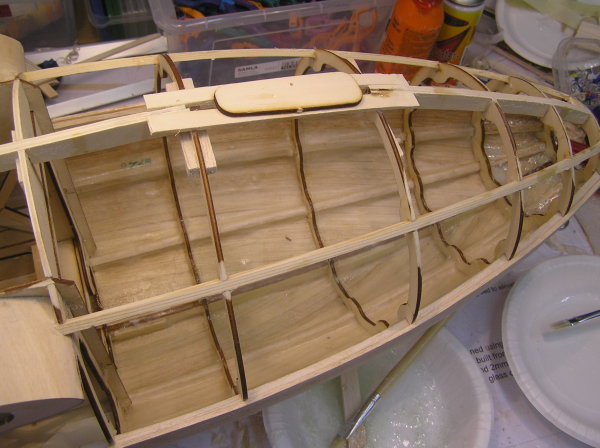
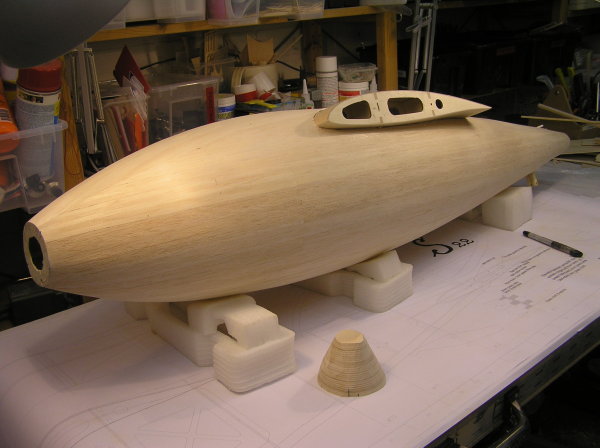
I noticed minor problem with current fuselage structure. This fuselage is a bit like tube with opening for pilot at top. It will be sheeted with balsa. And I used balsa to all longitudial spars.
So all this leads to interesting risk with structure. If there is an knock pushing front of fuselage upwards it will collapse all balsa structures as they are not strong enough. Only longitudial hardwood structure is lower keel. Upper keel is cut due opening for pilot...
This is rather embarrasing.
It means that I must change uppermost spars to spruce. Easier said than done  as 6x6mm spruce is not easy to twist around that fuselage shape. as 6x6mm spruce is not easy to twist around that fuselage shape.
First I must re-connect upper keel just to keep it's shape while adding spruce. The spars which will be replaced are actually already cut short. Cutting was needed to get wing saddle supportd.
Also, I added some missing formers at the same time.
Then spruce spars must be pre-formed using loads of hot water and suitable support. That must dry well.. at least till tomorrow.
Another thing, there should be support for sheeting under wing. That is easily formed using refuse from wing ribs.
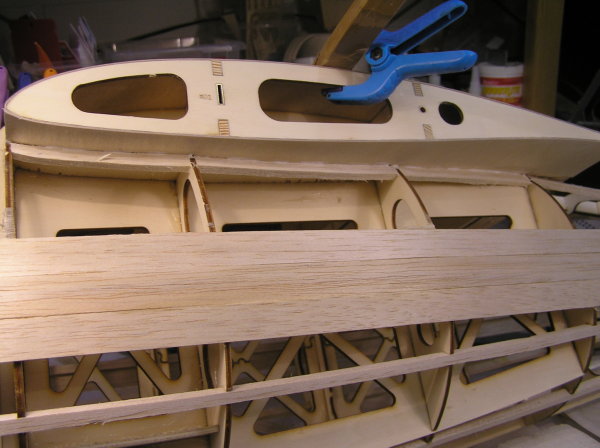
That fits well enough.
Beginnings of hatch for elevator screws. I do not like idea of leaving nylon-screws (or anything else for that matter) visible.
Tuomas |
|
| Revenir en haut de page |
|
|
VincentB
Serial Posteur
Inscrit le: 23 Jan 2006
Localisation: A la playa, bajo el sol
Âge: 60
|
| Posté le: 03/12/2012 07:09 Sujet du message: |
|
|
|
Great work ![[clap]](images/smiles/Clap.gif) have you thought about how to build the landing gear with ski, to be enough strong? it could be removable for landing on the grass? have you thought about how to build the landing gear with ski, to be enough strong? it could be removable for landing on the grass?
Retroplane et modélisme en pause, vanlife à haute dose. |
|
| Revenir en haut de page |
|
|
tuootal
Apprenti Posteur
Inscrit le: 21 Mar 2010
Localisation: Espoo, Friisilä
|
| Posté le: 03/12/2012 21:22 Sujet du message: |
|
|
|
VincentB - thanks. For display use I will propably build 'scale' ski's. But for any kind of flying those original skis are totally out of question. I think here in Finland we know thing or two about skis and snow. With typical winter snow and plane of this size & weight those scaled skis would sink into snow immediately.
I doubt that they have ever worked unless original landing place was lake ice. Those ski's look typical cross-country skis which propably could keep max 150kg on top of snow. If used in skiing. But landing is totally different thing.
For flying I will do simple wooden skid on fuselage bottom. You cannot see it on pictures, but quite propably there was one.
And today's dish of balsa dust...
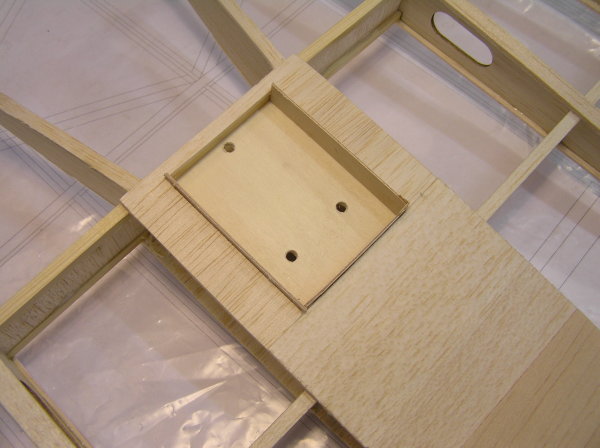
Time to do simple hatch. First bottom support with opening for magnet.
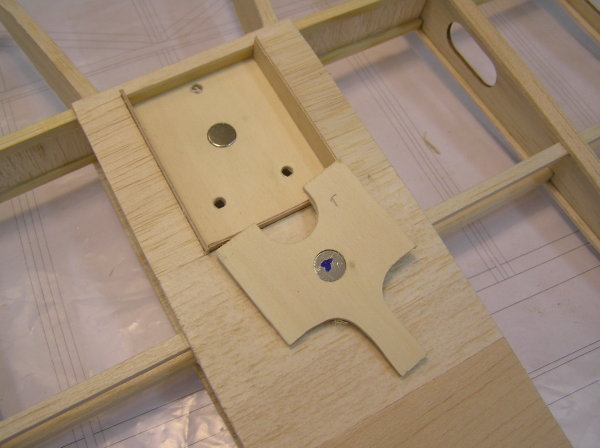
And then another magnet.
Some balsa on top of hatch and then some sanding. Done. This hatch is on underside of plane this is acceptable.
Tuomas |
|
| Revenir en haut de page |
|
|
tuootal
Apprenti Posteur
Inscrit le: 21 Mar 2010
Localisation: Espoo, Friisilä
|
| Posté le: 07/12/2012 22:58 Sujet du message: |
|
|
|
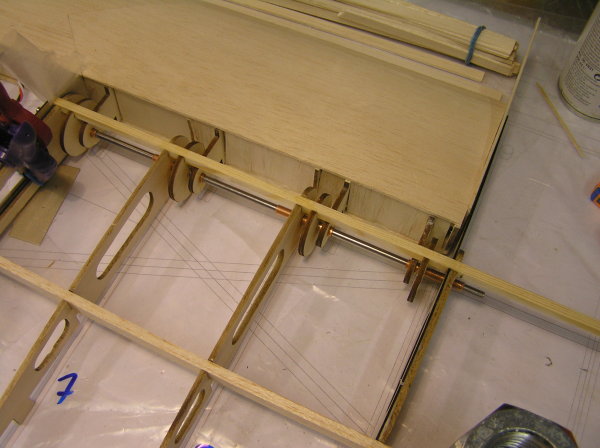
And then back to build.
Okay.. now those uppermost spars are spruce.. there is temporary bridging to keep pilot opening from collapsing.
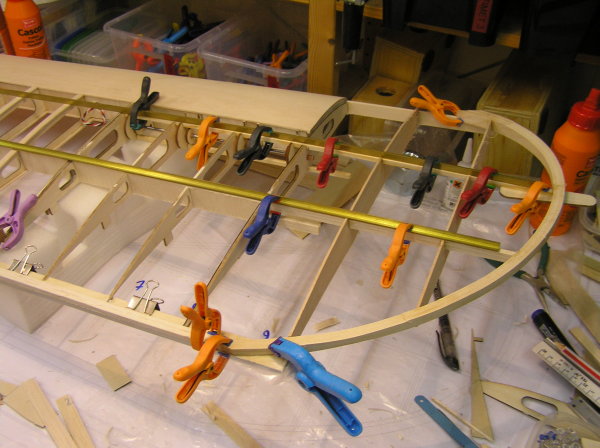
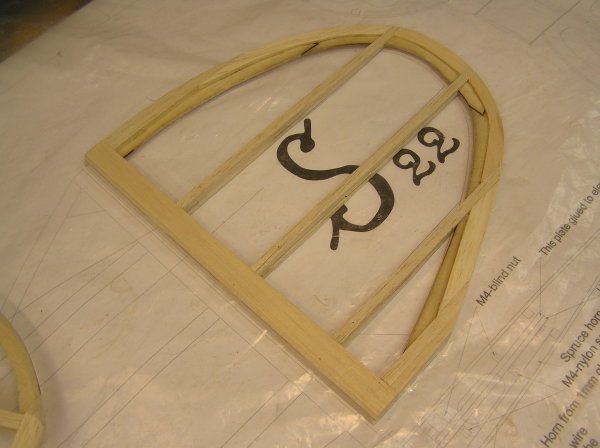
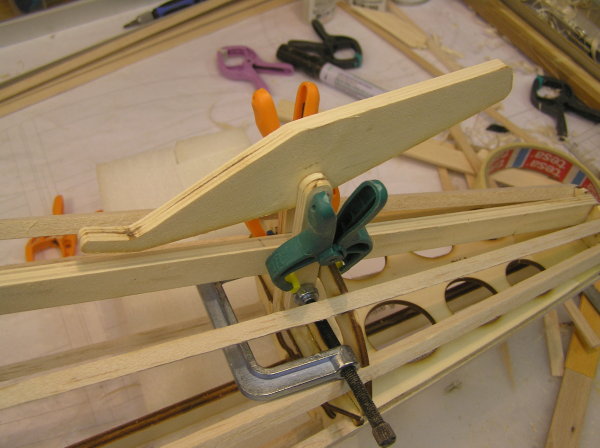
And then to wingtips. After all kinds of different implementation possibilities I decided simply to make form.
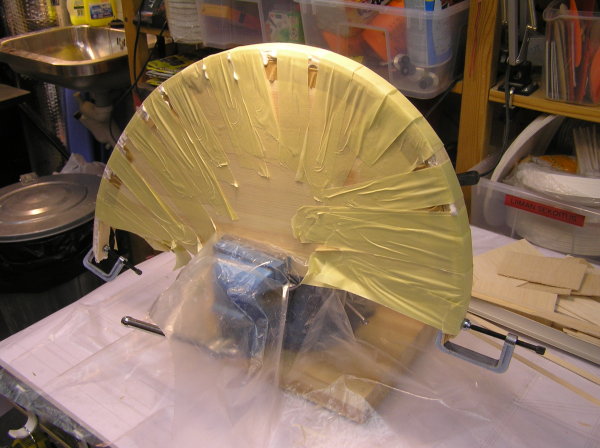
And then plenty thin woodstrips glued to form. This will take ages to dry, but there's no hurry.
Tuomas |
|
| Revenir en haut de page |
|
|
tuootal
Apprenti Posteur
Inscrit le: 21 Mar 2010
Localisation: Espoo, Friisilä
|
| Posté le: 09/12/2012 23:37 Sujet du message: Wing tips.. |
|
|
|
Then to the wing tips. As they are moving (= ailerons :) they are somewhat challenging. And there is also another challenge. Airfoil is constantly changing at tip so it took me quite bit head scratching. And I am not completely sure that this will work out. The geometry is quite complex specifically at the tip where HQ blends into rounded 5mm thick airfoil.
Some initial fiddling..
That's an hinge. Full wing thickness allows rather intriguing structures. The front of aileron will be sheeted..
Just checking that darned geometry. This will be really interesting. Normally when you are building scale model you can check how the original looks like. But not in this case, as the only surviving photographs are at beginning of this thread. Have to improvise something.
Tuomas |
|
| Revenir en haut de page |
|
|
tuootal
Apprenti Posteur
Inscrit le: 21 Mar 2010
Localisation: Espoo, Friisilä
|
| Posté le: 11/02/2013 22:46 Sujet du message: And then back to build... |
|
|
|
Hello,
I have been away for a while to do another project http://www.rcgroups.com/forums/showthread.php?t=1802213 but now I'm back. I need to get this baby to air as winter is nearing end and only 'scale' time to fly this thing is during winter. Original was flown only during winter.
So my aim is to get this ready for maiden before seasons first aerotow event. That is Arctic Hysteria, 15-17.3.2013 at Padasjoki, central Finland. So approx 1 month to go. And there are some minor details to be done.
Rudder almost finalized.
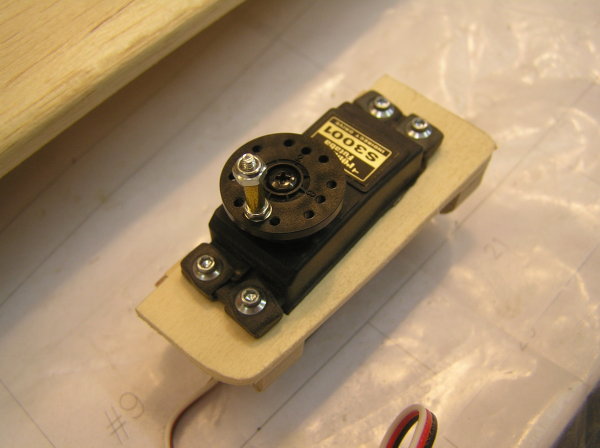
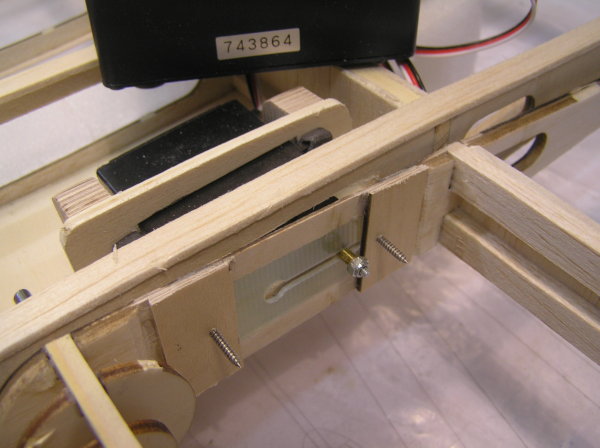
Aileron servo setup. This is quite complex thing. First those thick plywood parts are to be glued to wing. The 3mm liteply spacer is to be allow easier removing of servo as it is not glued to plywood parts. Removing it allows servo to move slightly inwards.
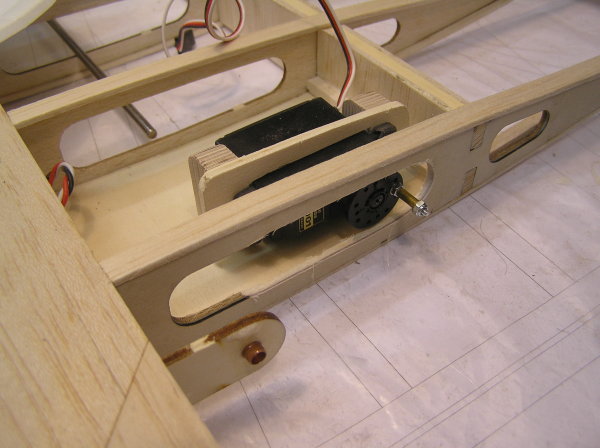
And now servo is in it's place. There are still supports missing. Removing servo is simply a) unscrew servo wheel, b) unscrew servo via opening at the end of aileron bay. c) remove servo.
Aileron (actually wing tip) is removed via moving hinge pin into wing, as there is room for it.
All this might sound slightly complex, but I think I have thought it out and it *should* be working... With emphasis on word should...
Tuomas |
|
| Revenir en haut de page |
|
|
tuootal
Apprenti Posteur
Inscrit le: 21 Mar 2010
Localisation: Espoo, Friisilä
|
| Posté le: 20/02/2013 21:44 Sujet du message: Aileron actuator. |
|
|
|
Okay, now I have done the first implementation test. It seems to be working, but there is some finetuning to be done.
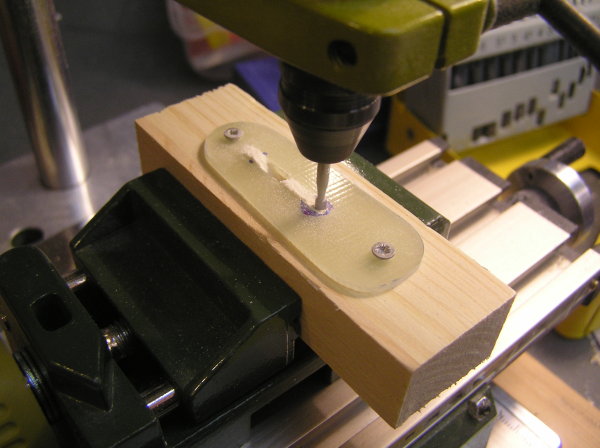
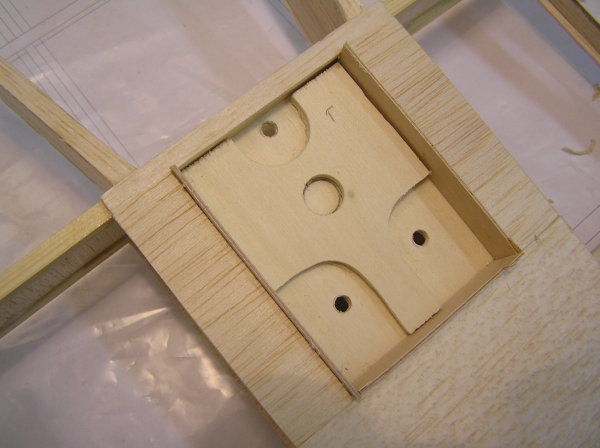
First the actuator plate is cut into shape. Then the slider groove is milled into it. This is quite delicate stage as too large groove causes unnecessary play. Plate is from 1.0mm (or was it 1.5?) glassfibre plate.
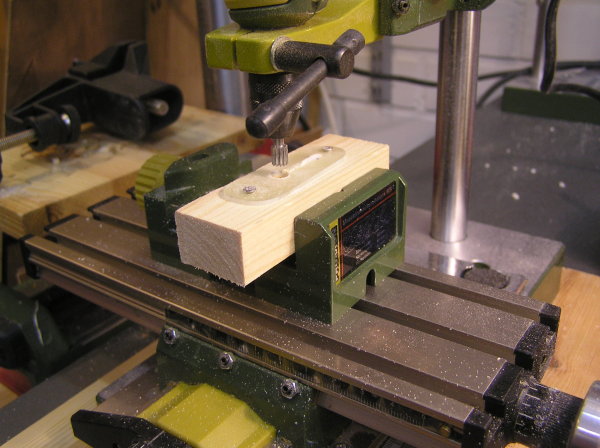
Second stage is to cut keyhole for installation phase.
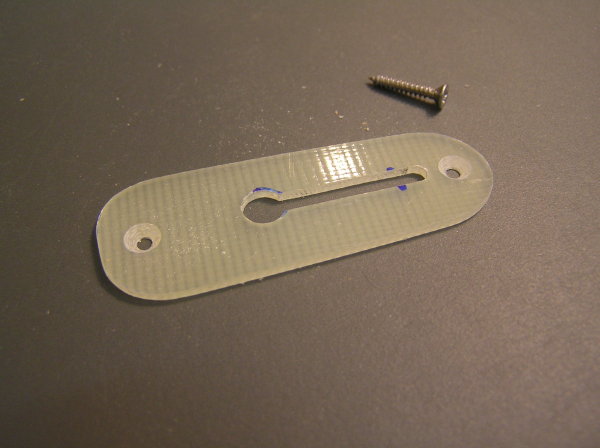
And then cut sunk openings for screws.
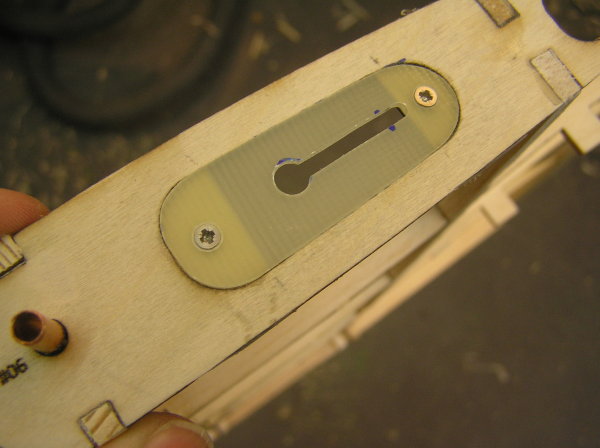
Fitted into aileron. Which is really wing tip :).
Finalized product. I have to tidy everything and sand aileron into shape. But it seems to work, which is most important thing.
And short video to prove that.
http://youtu.be/9mhpHPuH4Ak
Tuomas |
|
| Revenir en haut de page |
|
|
VincentB
Serial Posteur
Inscrit le: 23 Jan 2006
Localisation: A la playa, bajo el sol
Âge: 60
|
| Posté le: 21/02/2013 06:20 Sujet du message: |
|
|
|
The most difficult is to make simple, ingenious system
Retroplane et modélisme en pause, vanlife à haute dose. |
|
| Revenir en haut de page |
|
|
tuootal
Apprenti Posteur
Inscrit le: 21 Mar 2010
Localisation: Espoo, Friisilä
|
| Posté le: 21/02/2013 21:23 Sujet du message: |
|
|
|
Merci, Vincent
And today is time to sheet wing tips. It required quite a bit of sanding to get tips into shape but it looks right now.
Tuomas
|
|
| Revenir en haut de page |
|
|
tuootal
Apprenti Posteur
Inscrit le: 21 Mar 2010
Localisation: Espoo, Friisilä
|
| Posté le: 24/02/2013 19:58 Sujet du message: |
|
|
|
Next to aileron. This is rather large aileron, as it is really half wing. So it should be aerodynamically good enough.
First rolled 2mm balsa around leading edge of aileron
Then made openings for hinge keys.
With soft balsa, and cross-grain plywood
And seal the gap
Tuomas |
|
| Revenir en haut de page |
|
|
tuootal
Apprenti Posteur
Inscrit le: 21 Mar 2010
Localisation: Espoo, Friisilä
|
| Posté le: 24/02/2013 20:10 Sujet du message: All kinds of small details |
|
|
|
Then to collection of all kinds of small details.
Rudder. This is extremely strange looking rudder. I laminated leading edge from 2mm balsa and thin plywood. Just to keep it light but also to keep it's form. It is really large.

Tailskid detail.
Glued to fuselage.
And then to sheeting of fuselage. I decided to strip initial 2mm sheeting and start all over again with 3mm strip-sheeting. It forms much more nicely.
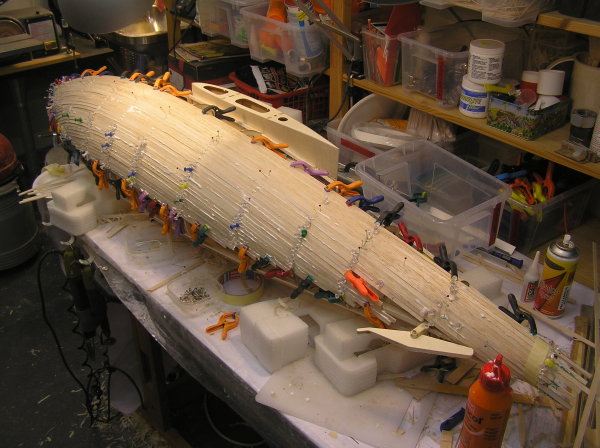
This looks quite extreme. I am using PVA-glue for health considerations. I have used PVA quite often and one trick is not to try to wipe excess glue off. It is much easier to remove it when it is slighlty dried. So those drips just fly away with light planing. If wiped down they require much more work.
Initial drying and some planing. Not finalized, just checking form.
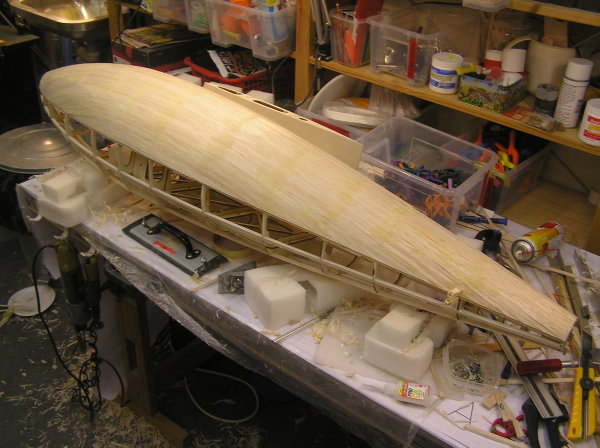
Another angle.
Tuomas |
|
| Revenir en haut de page |
|
|
Papy Solex
Accro Posteur


Inscrit le: 31 Jan 2012

Localisation: Louzac St André
Âge: 79

|
| Posté le: 25/02/2013 23:10 Sujet du message: |
|
|
|
Hi Tuomas,
Gorgeous....
With the genuine airfoil and a poor elevator volume, i presume this glider could be a bit tricky... ![[humm]](images/smiles/humm.gif)
You have done the best choice with a HQ airfoil family unstead the original.
No risk no fun, i agree that philosophy, that's mine, that's yours....please, let's astonished, happy to read you... 
Jean-Paul "Papy Solex"
"Ce n'est pas parce que les choses sont difficiles que nous n'osons pas, c'est parce que nous n'osons pas que les choses sont difficiles" Sénèque.
"Un esprit créatif est un esprit libre" |
|
| Revenir en haut de page |
|
|
tuootal
Apprenti Posteur
Inscrit le: 21 Mar 2010
Localisation: Espoo, Friisilä
|
| Posté le: 27/02/2013 22:18 Sujet du message: |
|
|
|
Merci Papy, I am a bit worried whether this will be flyable. My main concern is total lack of v-form combined with 'interesting' ailerons. I might end up doing barrel roll on maiden tow.
Also short fuselage will contribute with (un)stability.
All in all, it will be interesting.. Extremely interesting.
And then to today's progress.
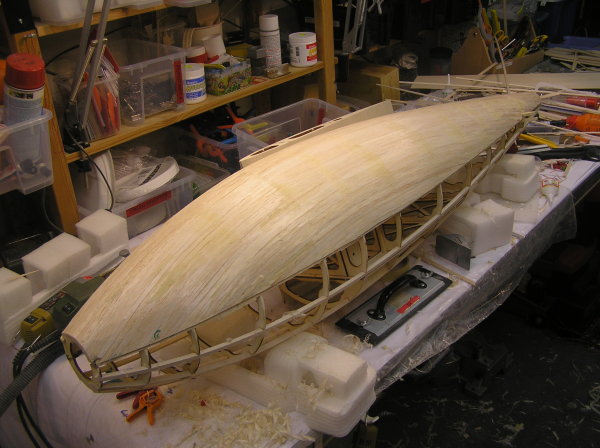
Another quarter of fuz sheeted. It does look a bit like boat. Possibly one could use this is an float glider?
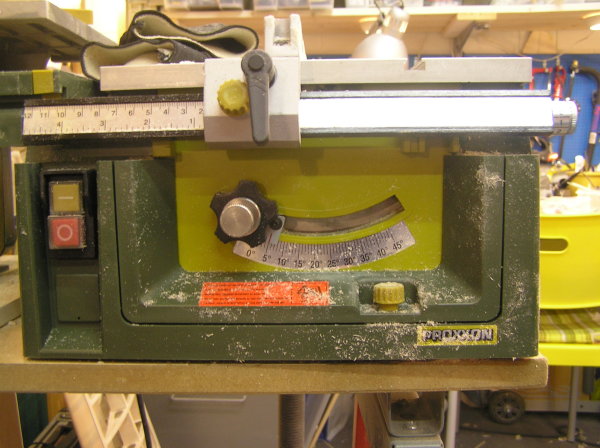
One note regarding sheeting. I used strip-sheeting and with 3mm thickness there is possibility of gaps on outside of fuz. So I used 5deg tilt in table saw while sawing strips. First one cut, then flip sheet and then next cut, flip and next.
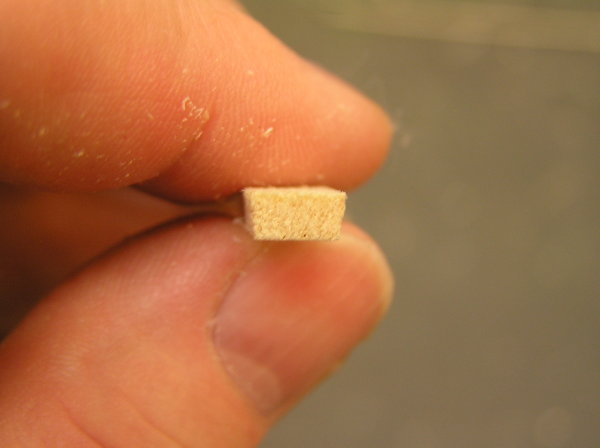
And the result is strip which has tilt on both sides.
The reason for using 3mm strips was to allow plenty of sanding as this is quite challenging form. I will glass this fuse from inside just to make certain there wont be too many holes after flights. |
|
| Revenir en haut de page |
|
|
Papy Solex
Accro Posteur
Inscrit le: 31 Jan 2012
Localisation: Louzac St André
Âge: 79
|
| Posté le: 28/02/2013 10:36 Sujet du message: |
|
|
|
Hi Tuomas,
Don't worry, a glider can fly without dihedral...it just needs a good three axles piloting... 
Beautifull construction indeed....i presume you like ship' stucture...me too, see below
I love all what is atypic....my Moskalef Strela has a terrific roll instability...but i dare, that's the most important... 
Jean-Paul "Papy Solex"
"Ce n'est pas parce que les choses sont difficiles que nous n'osons pas, c'est parce que nous n'osons pas que les choses sont difficiles" Sénèque.
"Un esprit créatif est un esprit libre" |
|
| Revenir en haut de page |
|
|
tuootal
Apprenti Posteur
Inscrit le: 21 Mar 2010
Localisation: Espoo, Friisilä
|
| Posté le: 03/03/2013 23:28 Sujet du message: |
|
|
|
Papy - that is gorgeaus. It is modelling art. You should have not flown it, or covered it.
And regarding 3-axles-piloting skills... I can build, yes, but flying is not my forte. Flying this will be interesting.
going forward:
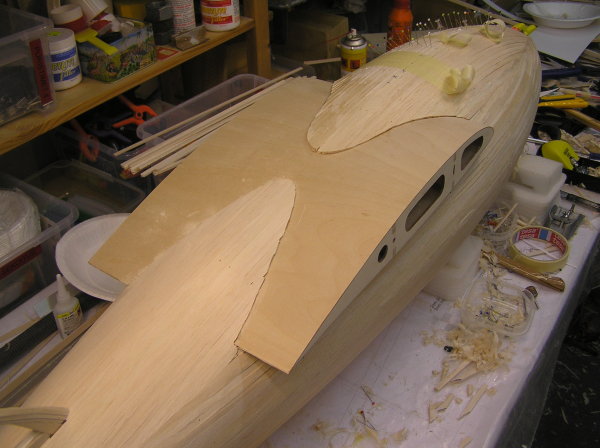
Decided to try plywood nose block. It will be heavy and tough to sand, but.. had no wood with matching tone to balsa at hand. The plywood ply's will be wrong way, but it is ok.
Triel fitting tail group. Fits & works.
Glassed inside of fuz, nose only. I used 2 layers of SIG heavy cloth for all other place, but the first former bay was too challenging. Ended up using hacked gf and epoxy. It is much easier to apply.
And elevator + rudder servos. That elevator is so large that I decided to use HK12k servo for it. It is slow, but it has ~10kg force. For rudder there is just standard servo.
Tuomas
|
|
| Revenir en haut de page |
|
|
tuootal
Apprenti Posteur
Inscrit le: 21 Mar 2010
Localisation: Espoo, Friisilä
|
| Posté le: 03/03/2013 23:31 Sujet du message: Sheeting completed.. |
|
|
|
And then I had enjoyable day of sheeting. This is really strange looking plane.
Note that plane is nowhere near completely sanded etc. So there are rough edges.

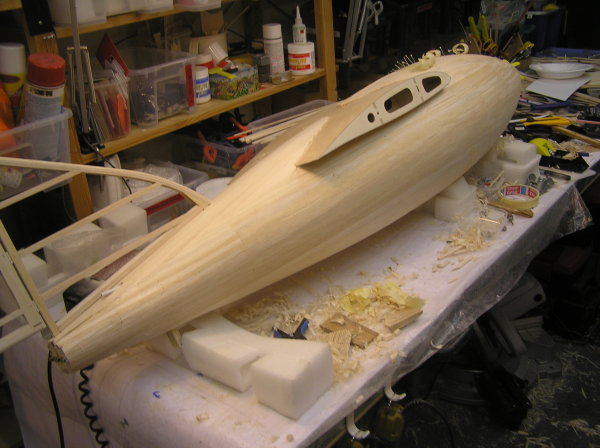
This is quite tricky form. I have to find find out nice way to 'end' those curves, sanding it flush would be challenging.
Tuomas |
|
| Revenir en haut de page |
|
|
Christian
Serial Posteur
Inscrit le: 02 Mai 2006
Localisation: Europe
Âge: 61

|
| Posté le: 04/03/2013 21:57 Sujet du message: |
|
|
|
Christian

Orlik en construction |
|
| Revenir en haut de page |
|
|
tuootal
Apprenti Posteur
Inscrit le: 21 Mar 2010
Localisation: Espoo, Friisilä
|
| Posté le: 04/03/2013 23:55 Sujet du message: |
|
|
|
Merci Christian,
And today I sanded it to shape, not yet finalized but good enough for next steps. I also sanded initial shape to nose block.
And cleaned shop. That took 2 hours.
There is one problem with this plane. The pics which I have posted in the first messages of this thread are all that exist. So I have no clue of colour of plane, nor the details in cockpit area. So it really is guessing and making something which is 'real' looking.
Tuomas |
|
| Revenir en haut de page |
|
|
VincentB
Serial Posteur
Inscrit le: 23 Jan 2006
Localisation: A la playa, bajo el sol
Âge: 60
|
| Posté le: 05/03/2013 08:11 Sujet du message: |
|
|
|
I have always also this same problem with my historical gliders with rare photos in black and white. We see on your pics a zone more dark.
Retroplane et modélisme en pause, vanlife à haute dose. |
|
| Revenir en haut de page |
|
|
Papy Solex
Accro Posteur
Inscrit le: 31 Jan 2012
Localisation: Louzac St André
Âge: 79
|
| Posté le: 05/03/2013 09:55 Sujet du message: |
|
|
|
Hi Tuomas,
Good work indeed...
As Vincent says, it's hard to fine the genuine colours..!
Instead stressing your mind, according to the unsual shape, try to contact a second hand dealer in the neighbouring of Peenemunde...
Go on, i love what you do...
Jean-Paul "Papy Solex"
"Ce n'est pas parce que les choses sont difficiles que nous n'osons pas, c'est parce que nous n'osons pas que les choses sont difficiles" Sénèque.
"Un esprit créatif est un esprit libre" |
|
| Revenir en haut de page |
|
|
tuootal
Apprenti Posteur
Inscrit le: 21 Mar 2010
Localisation: Espoo, Friisilä
|
| Posté le: 07/03/2013 22:26 Sujet du message: |
|
|
|
merci à tous!
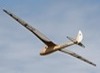
Regarding Peenemunde - I do have some doubts of that idea, but I remember seeing one glider which had periscope. Anyway - this chap Adaridi who was part of original team flying this plane did design another plane (see couple pages back). The plane was called Adaridi AD3. As it was designed for Finnish airforces it was dark gray.
So it looks a bit like submarine..
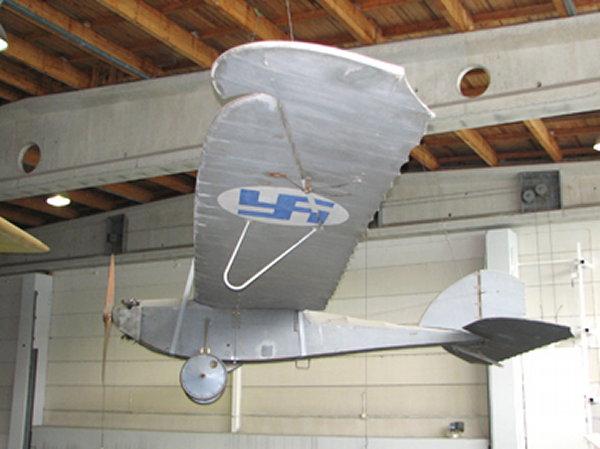
(that pic is lighter than the original plane which is in Finnish aviation museum (http://www.ilmailumuseo.fi/index.php?page=home-eng) , near Helsinki-Vantaa airport. Great place to visit. Pic used without permission, but I think they wont complain.
Btw - Just to be cautious - that is not german swastika. It is Fin airforce emblem which was taken into use years before nazis started using it. It originates to Swedish count Von Rosen who gave Finnish government it's first airplane, thus forming Finnish airforces. That swastika was painted on that first plane by this swedish count and to commemorate that we used it as an emblem for airforces for couple decades. Until nazis spoiled that sign. If you look carefully, it is other way around that german one. For more information see http://en.wikipedia.org/wiki/Finnish_Air_Force . I think that this story really proves the old visdom - if you get something as an present, paint it |
|
| Revenir en haut de page |
|
|
tuootal
Apprenti Posteur
Inscrit le: 21 Mar 2010
Localisation: Espoo, Friisilä
|
| Posté le: 07/03/2013 22:41 Sujet du message: |
|
|
|
And then to today's steps. I got terrible flu so did not have energy to do anything important, but something still.
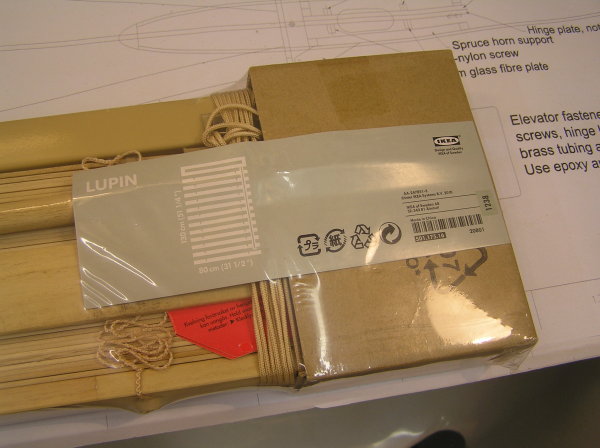
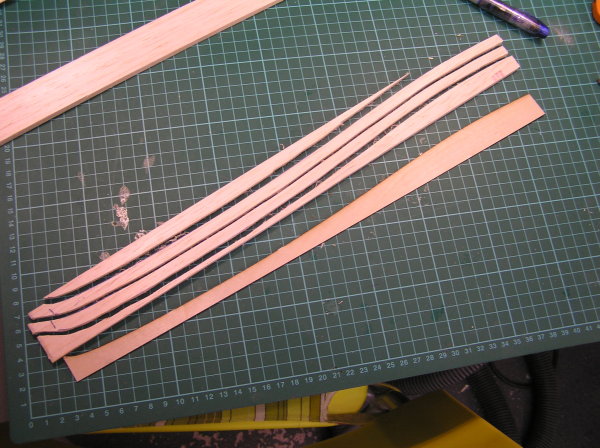
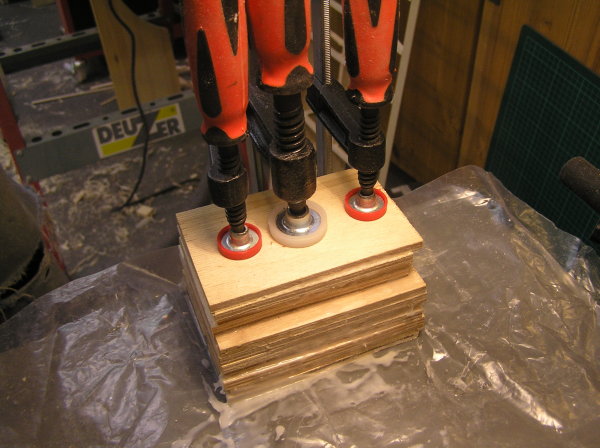
I have one thing which I tend to do in almost all of my builds. I want to trash something bought from local Ikea to use in builds. Strange. And today I wanted to get some wooden strips just to use in landing gears. Lupin-window shutters cost 9.99eur. Fun.
(I have no connection to Ikea - just an customer who wants to smash their products, interesting? I have plenty examples of this behaviour )

And there you have it, approx 40 2mm wood strips.
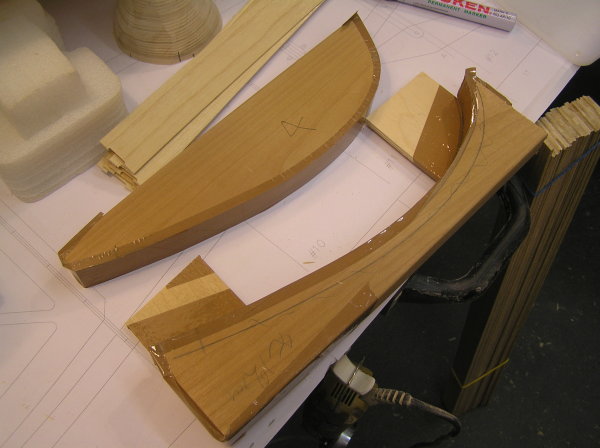
Mould.
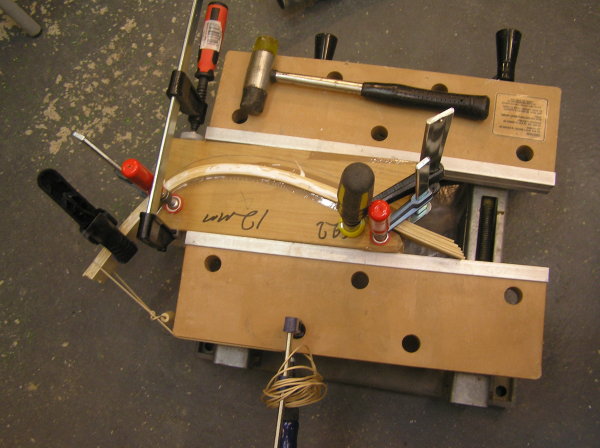
Which is then used in pressing landing gear into shape. Just your average modelling tools.
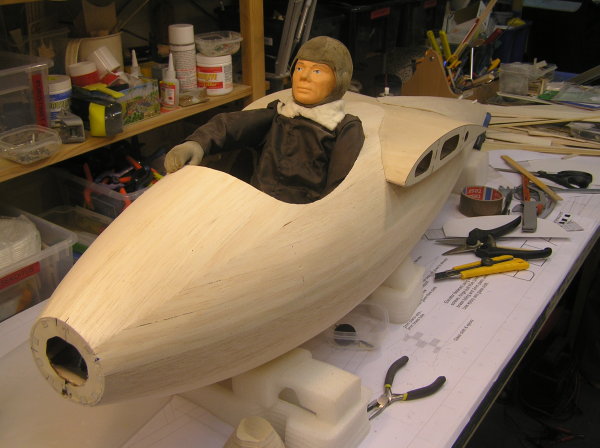
Cut opening to plane to allow pilot to step in. Btw - that 1/3 pilot is not Finnish, he comes from Wales. And he does look awfully serious, but I guess that they welsh people must be serious , their weather is so rainy.

And beginnings of second wing tip.
Tuomas |
|
| Revenir en haut de page |
|
|
|